Spring is finally here! It has been so great spending time in the warm sun this week.
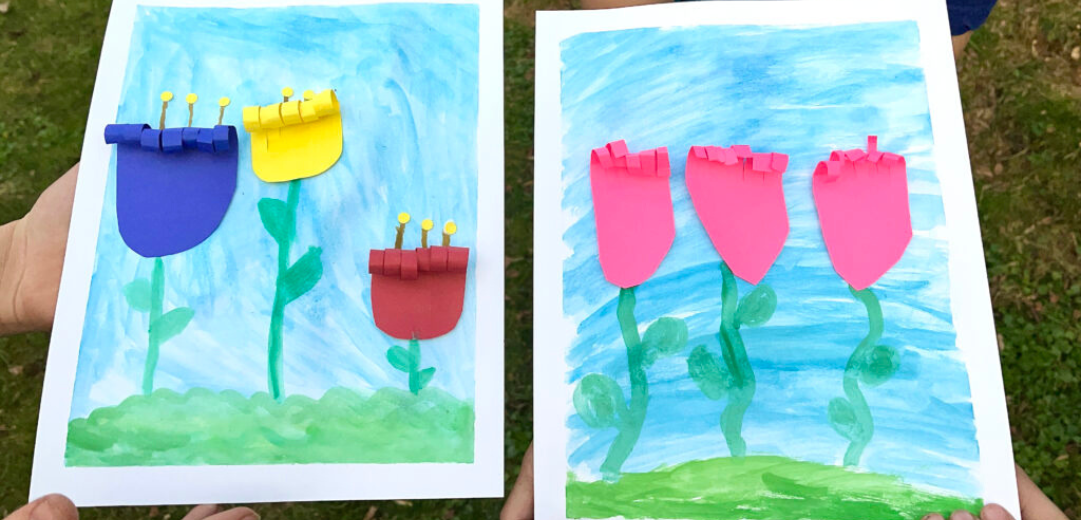
My “craft team” (aka my kids!) decided we needed to create more flowers as we wait for all the flowers to bloom! This cheery project helps children develop fine motor skills, perseverance, and visual-spatial understanding. Encourage your child to do as much of the project on their own as they can. They will gain self-esteem and determination as they make the project their own. Art projects are a great place for self-expression.
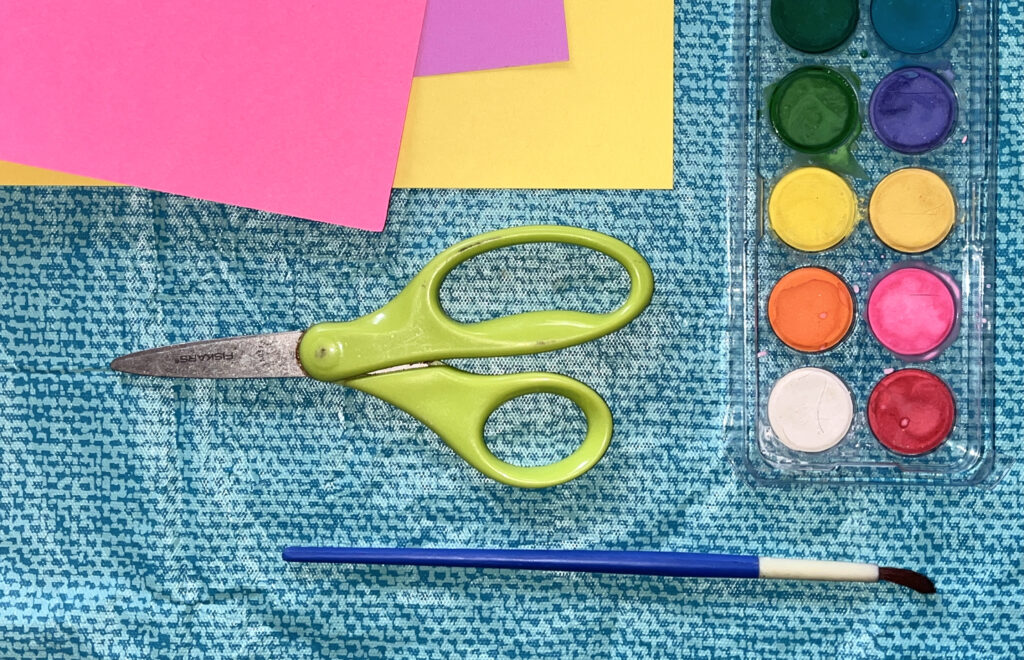
Supplies:
- Paper suitable for painting
- Colored paper
- Paint & Paintbrushes
- Scissors
- Glue
- Optional: Tape, Hole punch, Yarn
Let’s Get Started
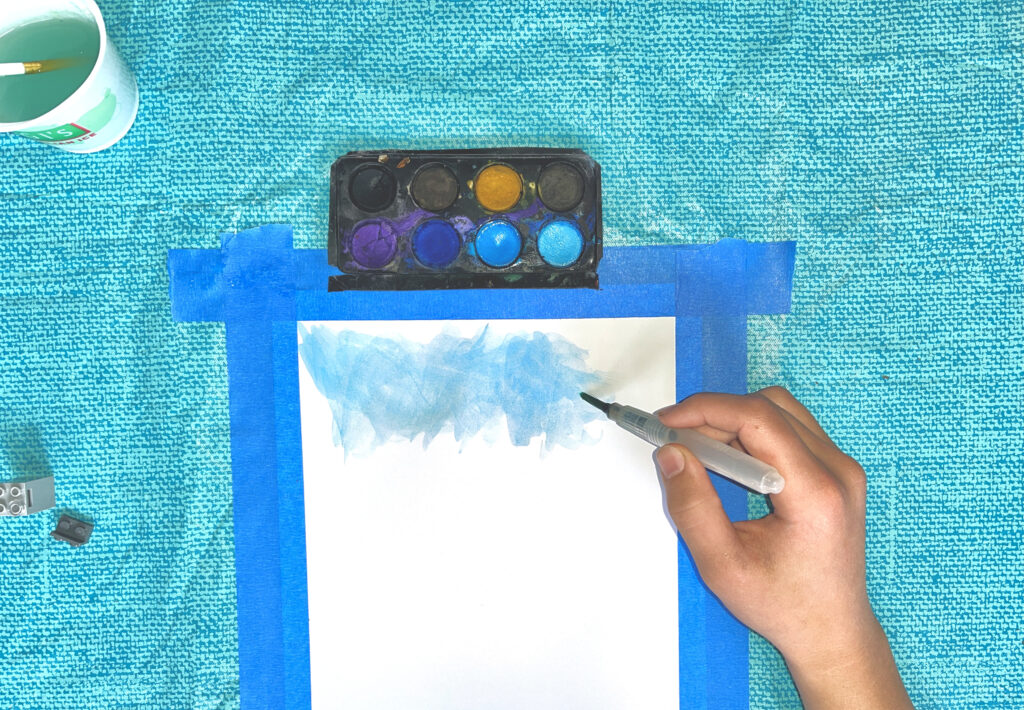
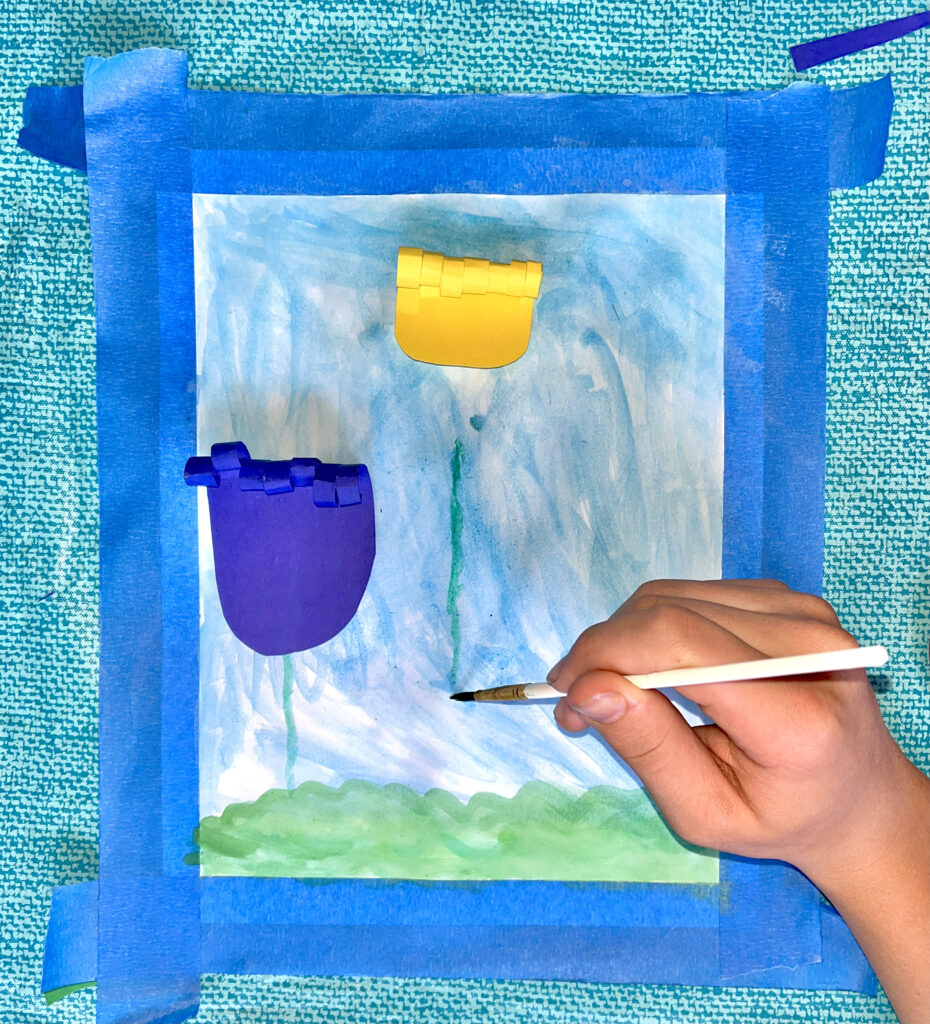
When we are doing a paint project, I like to tape all the edges of the paper down onto the table. Not only does it secure the paper in place, but when you are done and remove the tape, it creates a nice border to “frame” the finished artwork.
We painted the sky varying shades of blue. If you’d like to include a sun, rainbow, or clouds, I recommend that you do that first. Clouds could be drawn on with a white crayon or oil pastel and then painted over. This creates a fun visual effect. Be sure to press firmly and make thick lines.
Grass or even dirt can be added to the bottom of the background. What else is found on the ground in nature that your artist would like to add to their artwork? Bugs, birds, twigs, leaves. Take a few minutes to discuss or explore outdoors to get your imagination flowing.
Once your background is complete, set it aside to dry.
Flower Time
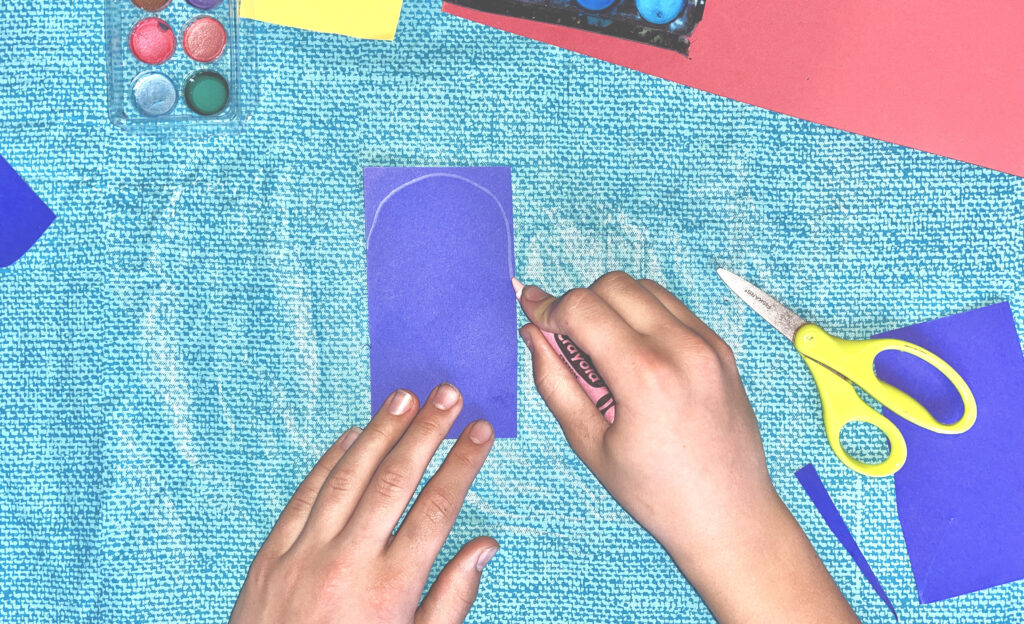
To create the flowers, you’ll use colored paper and scissors. Discuss how many flowers you’ll want to include in your finished project, then estimate how wide each one will need to be so they all fit on the paper. Cut out rectangles and adjust the sizes as needed to ensure they will fit.
Next you’ll cut the bottom curved edge of the flower on one of the narrow ends of the rectangle. Draw a line to use as a guide for cutting or do this free-hand.
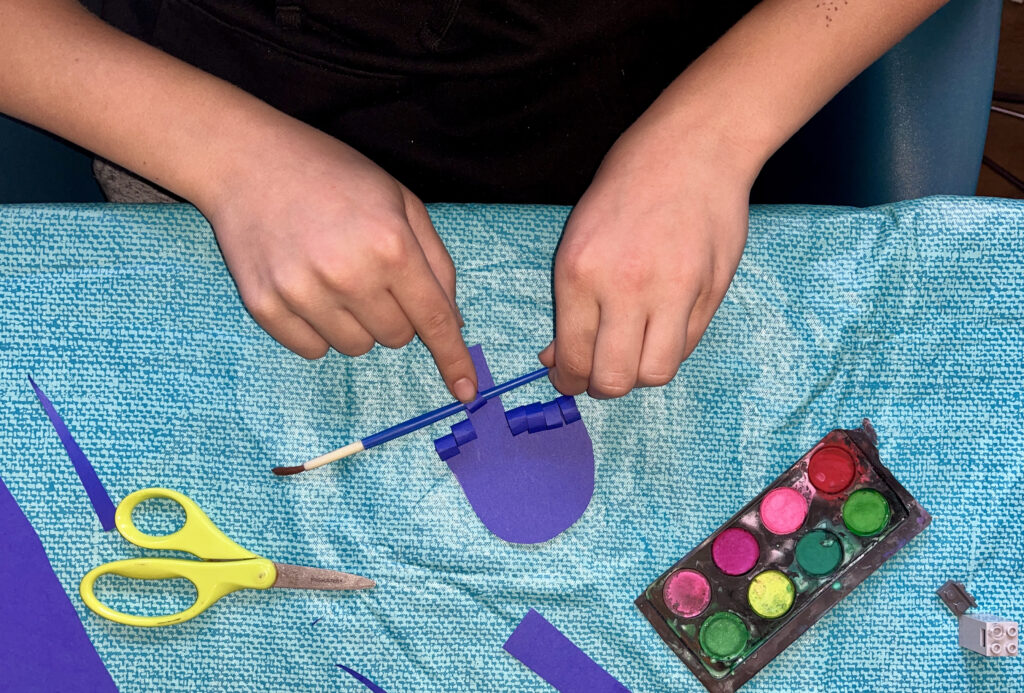
Starting on the narrow edge opposite the curve, cut thin strips about half way down the paper. This is where fine motor skills can be practiced. Encourage your child to try to stop the cuts at the same place and to cut each strip an equal width. You could also use a ruler to draw lines on as guides if desired.
To make the curly tops for each flower (known as paper quilling), roll up each paper strip individually. You can do this by hand but we found it worked better to use the end of a paintbrush as a guide. Hold the curl in place for a few seconds to secure the shape, then gently slide the paintbrush out one side. Repeat for the remaining flowers.
Finishing Touches
Add in stems and leaves. You could use paint, glue on yarn/ribbon, glitter glue, or cut out strips of paper. Maybe all the flowers are in a vase. Lay the flowers on top of the painting to guide where each stem will go and ensure there is room for each flower. Once the stems and leaves are in place, glue each flower to the top of the stem. One of my artists used a paper punch and paint to make the stamens.
Once the glue has dried, choose a prominent place to display your child’s artwork and enjoy these curly-topped flowers together!
There are many fun paper curling projects as well as specialized tools for shaping. I remember making a paper bag lion with a curled mane when I was in 1st grade! Let us know your favorite paper curling project in the comments below.
Keep going! Keep growing!
Andrea