
Take advantage of the slower pace of summer to work on the necessary skill of shoe tying! I still remember my mom teaching me as a young child. I was sitting on top of the deep freeze in the mud room, wearing my little red shoes. I loved those shoes!
Since this skill requires a lot of focus, it would be a good morning activity when your child is refreshed and energized after breakfast. It has benefits too! Not only will it (eventually) help you get out the door a little quicker, it’s also a great way for your kiddo to practice their fine motor skills–super beneficial with their handwriting next school year!
You can make this activity feel like play time with this quick and easy project.
Let’s get started
- Grab a shoe (flip-flops work great) and an empty cereal box. You could also use corrugated cardboard, but it is a little harder to cut through. Trace the outline of the shoe onto the cardboard.
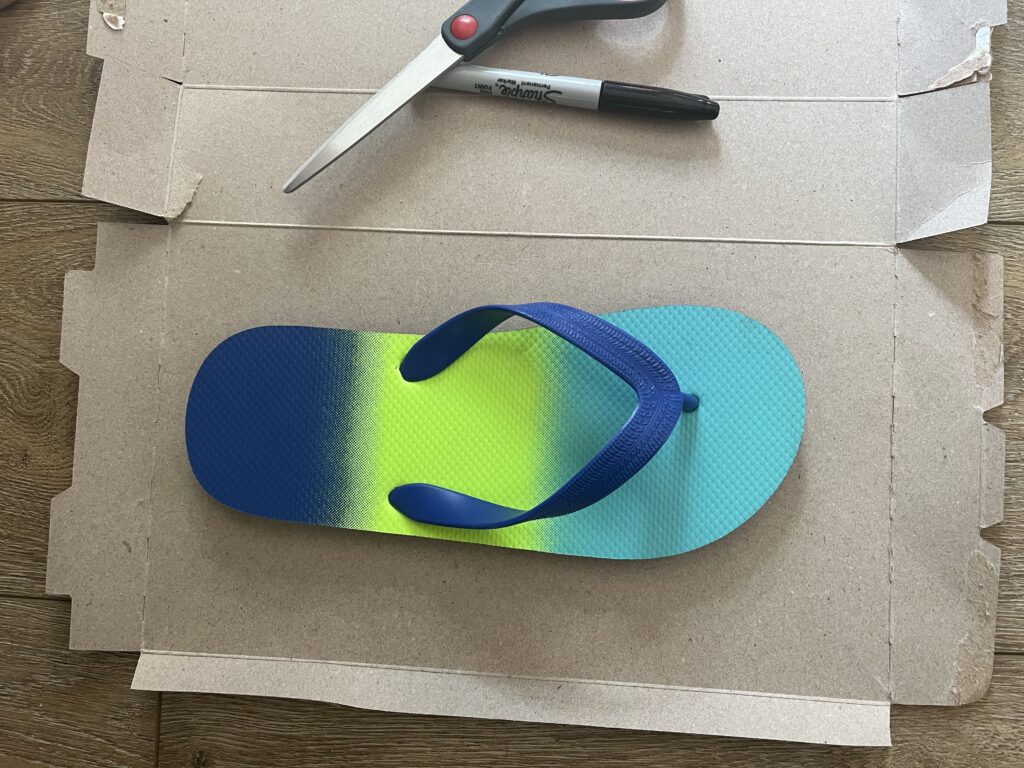
- This step is for an adult. Using the outline as a guide, cut out the shoe.
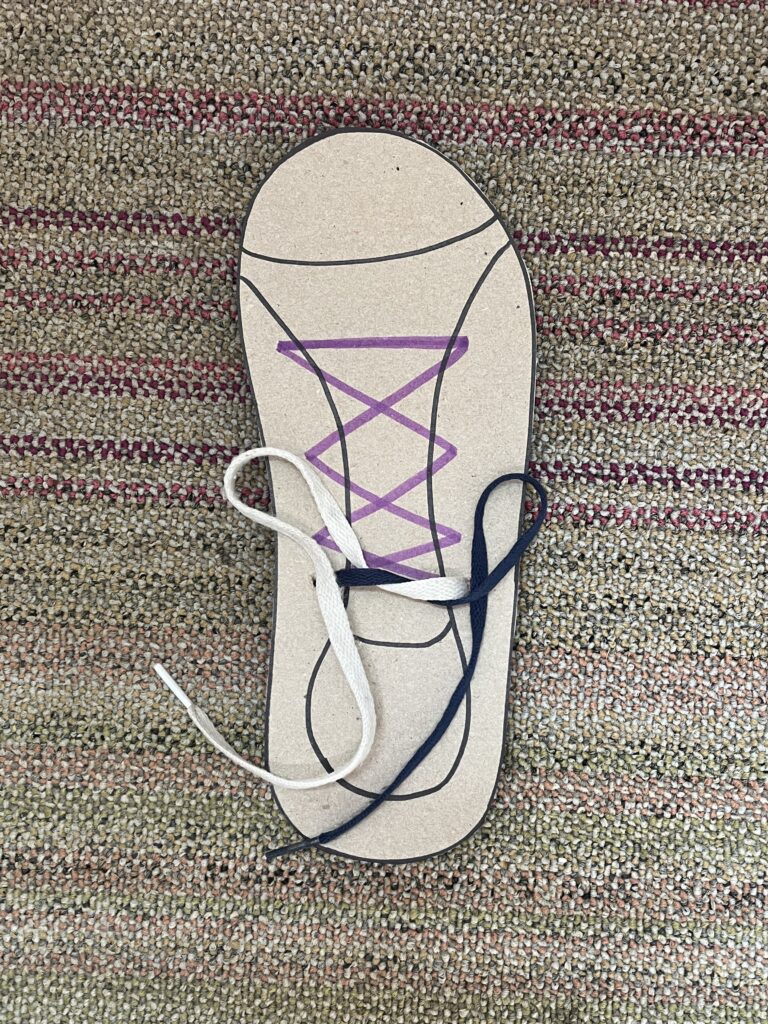
- Art time! Grab one of their favorite shoes for a reference and they can sketch on any stitching, toe cap style, and the center tongue to make it more realistic. Decorate the shoe with crayons, markers, or stickers to personalize it.
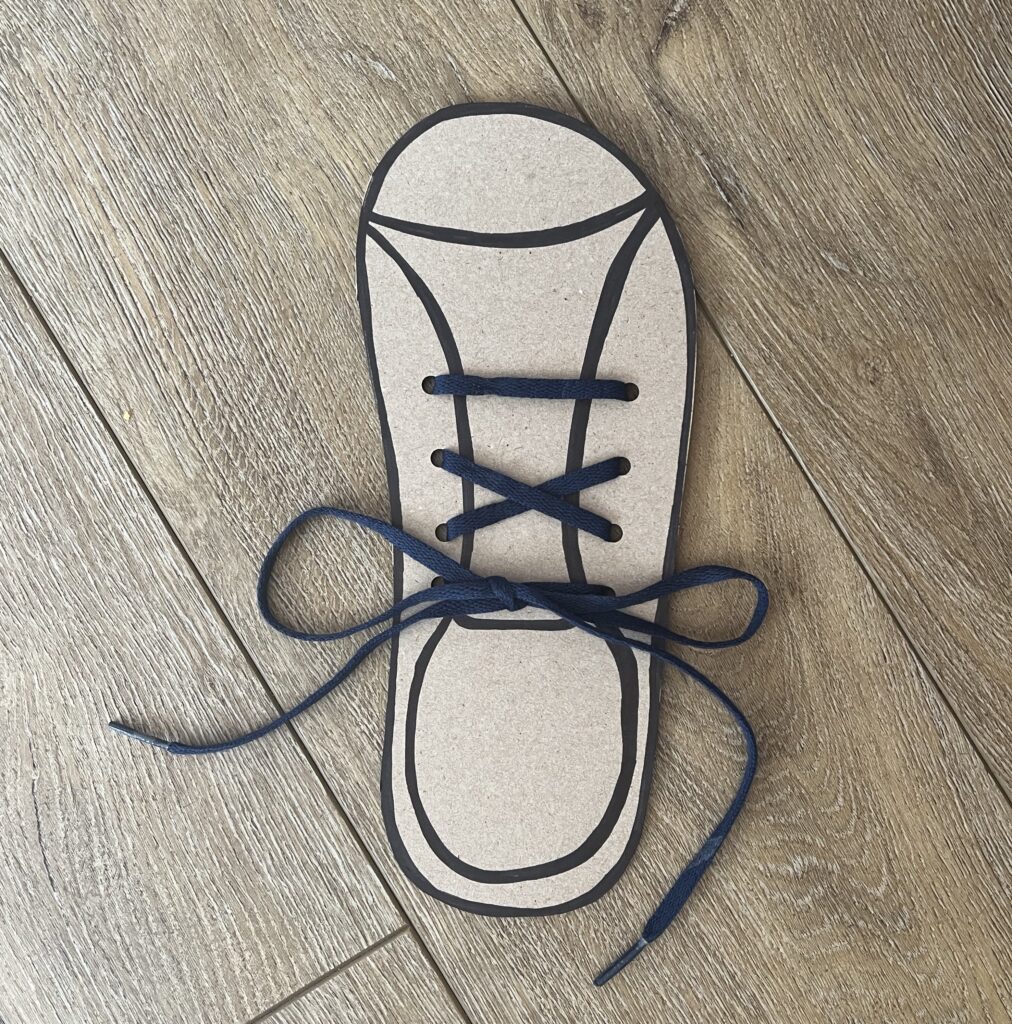
- Once the shoe is styled, it’s time to add in the eyelets. If you have a hole-punch, punch 3-4 holes along the tongue on each side. Or, an adult can use a knife to poke in the holes (an easy version is to just poke one hole on each side, then color in the laces).

- Lace up the shoe as you would a normal one. Tip: That jumble of laces can get confusing. To avoid frustration, use two different colors of laces if your child is having a hard time keeping things in order. Put one lace through each side, tie them together on the back of the template and tape to hold in place.
- Now it’s time for you to demonstrate the process a few times and let the practice begin!
There are a lot of cute poems on-line that can help your learner to memorize the steps, as well as other cute ideas for “shoes” such as an empty shoe box or an egg carton.
This is a new skill for your child with a lot of steps to keep straight. Use words of encouragement to help them through. If your child gets frustrated, take a break for a few minutes (or a few days) and try again at a time when they are relaxed. It’s also helpful to break the process down into smaller steps. Have them learn each step slowly over time, building on when they have mastered each skill.
Of course, there is also this super speedy way that just simply amazed me!
Let us know your favorite shoe-tying method or poem in the comments below!
Keep going, keep growing!
Andrea